Showing posts with label Recipe. Show all posts

Thursday, April 26, 2012

Quick-n-Easy, Chicken & Kale Dinner

Adjusted from Food and Wine Recipe Online (based on what I already had at home) this dinner was just one pan and minimal effort for a new DELICIOUS OUTCOME.  
    
The Kiddo at 15 Weeks for this one  :)
Perfect for any busy Mommy 
  
Roasted Chicken Thighs with Potatoes and Kale
Ingredients
1 bunch of kale, stems and inner ribs removed
1 large (or 2 smaller) Yukon Gold Potato
1 medium sweet onion
1/4 cup olive oil
Salt and freshly ground pepper
Paprika
2 lbs boneless, skinless chicken thighs
Lemon wedges, for serving
  
Preheat oven to 450 degrees.
  
In large/deep roasting pan, toss kale, potatoes and onion with olive oil, salt and pepper.  Arrange in an even layer along the bottom of the pan.
  
Season both sides of the chicken with salt, pepper and paprika.  Set on top of kale mix in pan.
  
Cover pan with foil and roast for 20 minutes in the upper third of the oven.
  
Remove foil and roast for another 30 minutes, or until chicken is cooked through.
  
Plate chicken and vegetables, serve with lemon wedges to squeeze along top before eating.  Delicious, health, quick and a will do again!  
  
The potatoes softened, the kale was soft with scrumptious crisp edges, the onion was just the prefect flavor enhancer and the chicken was lovely.  
  
Note, the original recipe called for leg quarters, which you then separate to thigh and drumstick before cooking.  I know the bone-in and skin on would make this even that much more delicious...but for convenience sake the boneless, skinless chicken thighs worked just perfect for us!

Friday, June 3, 2011

Recipes for Mexican Chocolate Cake with Cinnamon Cream Cheese Frosting & Chocolate Ganache


THE MEXICAN CHOCOLATE CAKE PART
(recipe from bakedbree.com, only differences are (1) I increased/eyeballed the cayenne from her 1/2 tsp (2) I used Hershey's cocoa powder, which seems lighter than what the original author used and (3) I did not use her recommended Cinnamon Mascarpone Frosting.)

Dry Ingredients
1 cup unsweetened cocoa
2 3/4 cup flour
1 1/4 cup sugar
1 cup packed brown sugar
1 1/2 tsp cinnamon
2 tsp baking soda
1 tsp cayenne pepper
1/2 tsp salt

Wet Ingredients
2 cups whole milk
1/2 cup olive oil
1/2 cup vegetable oil
2 eggs
2 tbls balsamic vinegar
1 1/2 tbls vanilla extract
  • Begin by preheating oven to 350 degrees. 
  • Spray two - 8" cake pans with Pam. Place a parchment paper disc in the bottom of each pan and spray again. 
  • Combine all dry ingredients and whisk. 
  • Add the wet ingredients and whisk until smooth and glossy. 
  • Pour into cake pans and bake for 45 minutes or until a toothpick comes out clean.
  • Cool completely.
Since I made the cake the night before, I wrapped each cooled layer in plastic wrap to keep them moist.


THE CINNAMON CREAM CHEESE FROSTING PART
(recipe from bridezillabakes.com.  I doubled her recipe for this cake, which is indicated by the larger measurements below)

Ingredients
2x 8oz packages of cream cheese, softened
6 tbls unsalted butter, softened
1/2 tsp vanilla extract
2 cup confectioners sugar, plus more for mixing
2 tsp cinnamon
  • Beat cream cheese, butter and vanilla with an electric mixer at high speed until fluffy. 
  • Sift in confectioners sugar and cinnamon, then beat at medium speed until incorporated. 
If frosting is too thick, add warm water a tbls at a time.  If frosting is too thin, add more powdered sugar a 1/4 cup at a time.

I also made this frosting the night before and just covered with plastic wrap and stored it in the fridge.  An hour or so before I was going to use it, I pulled the frosting out and brought it to room temperature.


THE CHOCOLATE-GANACHE GLAZE PART
(recipe from martastewart.com  I doubled her recipe for this cake, which is indicated by the larger measurements below)

Ingredients
1 1/3 cup heavy cream
12 oz chopped semisweet chocolate
2 tbls light corn syrup
  • Bring cream to a boil in a medium sauce pan.
  • Remove from heat, and add chocolate and corn syrup.
  • Let stand for 5 minutes.
  • Whisk until smooth.
  • Transfer to a bowl, and let cool, stirring often.
  • Use Immediately.
I did wait to make this once the cake and cream cheese part of the cake was assembled.

To read about my assembly methods for this gorgeous cake, please visit this post here.


GOOD LUCK & HAVE FUN!!!

Wednesday, July 14, 2010

Recipe for Flounder Taco Cups

(A FoodThearpy revision of Giada De Laurentiis' Tilapia Fish Tacos with Arugula)
*
What you'll need:
6 eggroll wrappers
Canola oil
Olive oil
3 cups coarsely chopped baby arugula
1 avocado, halved, pitted and flesh cut into 1/2-inch cubes
1 mango, peeled and flesh cut into 1/2-inch cubes
3 green onions, finely chopped
2 tablespoons fresh lime juice (from about 2 limes)
3 flounder fillets (about 8 ounces total)
Crème fraiche
Wasabi powder
Kosher salt and freshly ground black pepper

Directions
Taco Cups: Preheat the oven to 375 degrees. Brush each side of the wonton wrappers with canola oil and press into muffin pan. Bake for 6 minutes and let cool.

The Fish: Drizzle the flounder fillets with olive oil and season with salt and pepper. Pan fry or grill (I say grill!).

The Unlikely Filling: Whisk together 3 tablespoons of olive oil and the lime juice. Add the avocado, mango, green onions, and arugula. Toss until all the ingredients are coated. Season with salt, to taste.

Crème Fraiche w/a Kick: Mix together the crème fraiche, wasabi powder and salt to taste.

To assemble: Fill each cup with filling, lay fish along the top and dollop on some wasabi goodness!

Tuesday, July 13, 2010

When you house sit for us...

one can expect many surprises and treats...
* The first is this smiling face...literally in your face the whole time :)
*
Well that is true, except for when our angel decides he's tired and cuddles up into a little peaceful ball...so cute and innocent right?!?!
*
Hubs and I know our pup is an acquired taste and can be a lot to handle for the wrong person. With Hubs gone and the road calling me away from home, third party dog care is something I'm having to to take into consideration.
*
Up until my last trip The Sox Family (aka my brother/sister in-laws) have been incredible about taking the Pups into their home for days at a time. Pups loves it and they also seem (or rather claim, haha!) to enjoy it. On the last trip though, The Sox home was booked to capacity with visiting family, so we had to move to Plan B...Blue Light.
*
Blue Light is the mother of two wonderful little girls and has a special someone she shares her days with. Coming to my rescue, Blue Light and her whole crew moved into the house for a night and assumed all doggie care responsibilities.
*
When one house sits for us, they can expect all sorts of special treats...
for Blue Light and company it was an Asian Feast!
*
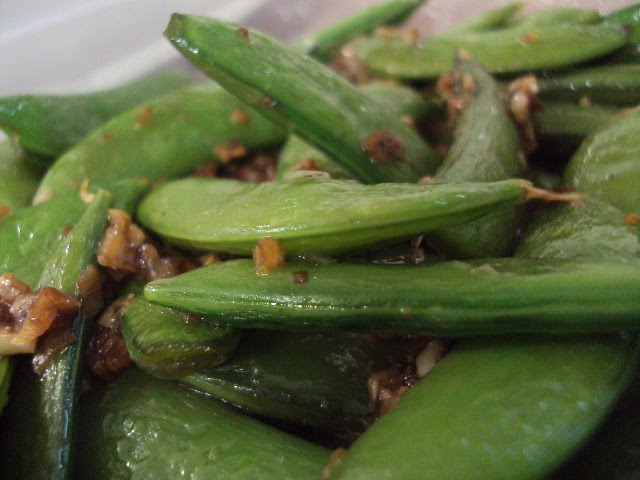
I picked up some sweet sugar snap peas at the Farmers' Market over the weekend. They were so darn good, how can you not love the summer freshness!?!?
*
They were cooked up in sesame oil, garlic, soy sauce and salt/pepper.
*
I also did a little spin on my mother's fried rice recipe. Trying to be sensitive to kiddos eating this meal, I really wanted to maximize the veggie use. Rather than meat in this rice I went with a combo of carrots and green and red peppers.
*
Making this Veggie Fried Rice, Korean-American Style, is pretty easy...
*
Begin by heating oil in a wok.
Saute garlic and veggies until softened just a wee bit.
*Note I did cut the veggies up pretty small, just in case that would help in getting the kids to eat it.
Add cooked rice (I use Korean rice and my handy counter top rice cooker), scallions, sesame oil, soy sauce, and black pepper.
Mix until combined and everything is evenly heated.
*
There you have it, pretty simple, mighty tasty and provides an additional servings of veggies, well hidden :)
*
The centerpiece of the meal - my mother's recipe for Bulgogi!
A Korean stir fry type dish, it is a salty/sweet treat made up of beef, garlic, onions and scallions.
*
This was actually one of my lil' sis' favorite things to eat growing up...translating to our family eating it a lot! Her favorite thing to do was to have the sauce poured over her white rice, so of course mom would usually try to make extra. The extra sauce approach has stuck and so when I do whip a batch up, there is plenty of to go around.
*
Made the evening before my departure, everything was packaged up and set in the fridge for easy reheating. I also picked up milk, fruit juice, Trout River's Rainbow Red Ale (for the grown ups), ice cream dots and Ben & Jerry's.
*
My hope was they would have everything they might need or want...and a couple of special treats :)
*
Thank you for the help Blue Light!!

Thursday, July 8, 2010

No Hubs = Girls' Night!

The summers are for parties and just because Hubs is gone that is no excuse for me not to host one...in fact it is the perfect setting for a 'Girls' Night'!!!
*

I love having fresh flowers in the house. Early on in our cohabitant years, I would occasionally buy bouquets or be semiannually gifted them from Hubs to decorate the house. Since then fresh flowers have fallen into the 'unnecessary expense' category. Hubs is like my Superman when if comes to finances and so at some point in the last few years I decided flowers were not a 'necessary expense'.

The white peonie above was rescued from a snapped stem from our flower beds...the cost was nothing and look at just how fabulously it decorates our coffee table!

Though fresh flowers might be an unnecessary expense when you're trying to save, it becomes a mood lifter when you're trying to just get through life one day at time. With Hubs gone, I fall into the later category and figured the smile these bring is well worth the cost.

There was also one small bunch of peonies hiding in the flower cooler, so I snatched those up as well (I love peonies!).

When it came to the cooking I had my right hand gal on hand to help. Better known to you as my Redneck BFF (let's call her Blue Light), she had her sleeves rolled up, drinking hat on and dove right in...

Of course I had the menu already roughly planned (remember I am a constant planner by nature), but Blue Light decided at the grocery store that she really wanted to contribute a dish of her own. Aiding her with the inspiration, we decided on a pizza-app...

The go-to Shipyard store bought crust topped with fresh mozzarella and prosciutto, served with a side of tasty bottled marinara...BIG HIT!

What added to this pizza's specialness was the use of the pizza stone...works like a charm every time :o)

Quick summary of the pizza -

Preheat Oven the 500 degrees with pizza stone in the middle of oven.

Place refrigerated dough in large bowl, coat with flour and allow to come to room temperature (it will rise a bit during this time).

Stretch dough and place on cornmeal covered pizza peel or cookie sheet.

Brush the top of the pizza with a wee bit of olive oil (garlic olive oil is my fav).

Top with mozzarella and prosciutto.

Transfer from peel (or baking sheet) directly onto the pizza stone and drop the oven temperature to 375 degrees.

Cook until cheese is melted and begins to brown.

Nice work Blue Light :o)

Inspired by The Future Mrs. Creature's Mother's creation, I was determined to create spring rolls at home as another app for this Girls' Night.

*
The filling was a combination of cooked and cooled vermicelli noodles and mix of napa cabbage, carrot sticks, mung beans, cilantro, lime juice and fish sauce. The meats added included chicken breasts poached in Thai green curry chicken stock and straight up cooked shrimp.
*
The filling tasted wonderful, but the technique in rolling them was a challenge. My good friends T/T came to my rescue, arriving just in time to take over rolling. Since then I've practiced one more time, but for the life of me cannot figure out how the restaurants get them so tight and perfect?!?! Tips anyone??
*
Accompanying these delicious spring rolls was this outstanding sauce, courtesy of Emeril and made by Blue Light...it's so gosh darn good that I ended up making another batch a week later and used it on more spring rolls and some pasta, YUM!!!!
*
Peanut Sauce (Nuoc Leo):
1 tablespoon peanut oil
3 garlic cloves, minced
1 teaspoon chili paste
1 tablespoon tomato paste
1/2 cup plus 2 tablespoons chicken stock or water
1/2 teaspoon sugar
2 tablespoons peanut butter
1/4 cup hoisin sauce
1/4 cup unsalted roasted peanuts, finely chopped
1 fresh red Thai chile pepper, seeded and thinly sliced, optional
Sriracha sauce, for garnishing, optional

*
Heat the oil in a small saucepan and, when hot, add the garlic, chile paste, and tomato paste, and cook until garlic is golden, about 30 seconds. Add the broth, sugar, peanut butter and hoisin sauce and whisk to combine. Bring to a boil, reduce the heat and simmer for 3 minutes. Remove from the heat and cool slightly before serving. Serve in small bowls, garnished with the peanuts, sliced chiles and optional hot sauce. May be served warm or at room temperature.
*
The rest of dinner was kept simple, so as to provide the chance for socializing and general merriment.
*

Grilled Pepper Mix.


Perfectly grilled asparagus.

I say perfect here, because the tops had that slight crisp that happens when you have just the right amount of oil and just the right temp...so good!
*
Earlier in the week I had the opportunity to visit Hubs and my old stomping ground in MA and made a special trip to the butcher shop.
*
Tequila-Lime Marinated Chicken Breast...
*

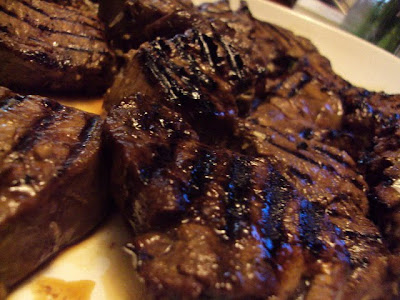
and Steak Tips.

I marinated the steak in a Korean Style Sauce. A couple of friends liked it so much the took the remaining marinade home to use the following day haha! An unfortunate thing did happen during this final step of grilling dinner...we ran out of gas! Don't you just hate that?!?! Well of course we do not have a second tank on hand as back up (though Hubs, I am beginning to think we should!).
*
With T/T heading up the meat grilling portion of our evening, we brought the partially cooked beef inside and finished it on a grill pan. It was of course tasty and not bothered by the broken cooking/grill time...phew!
*
The night was a great success, filled with laughter, catching up, games, toenail painting (for some unlikely recipients haha) and plenty of food and drinks!
Thank you to all the wonderful hockey girlfriends who made it!!! And a very special thank you to Blue Light for being the great Redneck BFF you are haha!
*
I can't wait to have another summer party!!
Parties are fun, parties are good and parties make me smile...especially when I am hosting them =O)
*
It does look as though the next party could be as soon as next weekend, as we prepare for our annual benefit ice hockey tournament...Hockey Fights MS! Woohoo!!!!!!!

Wednesday, March 17, 2010

Greek Yogurt taken to the Next Level!

Since so many of you seem to be such HUGE fans of our Greek Yogurt Dip, I thought I'd add an extra level of dippy goodness to the mix.
*
Mark Bittman, in his NY Times - The Minimalist column explains transforming your own traditional/typical yogurt into a thick, cut with knife, greek style yogurt!
http://www.nytimes.com/2010/03/17/dining/17mini.html?ref=dining
*
I have not tried this myself yet, but hope to the next time we make up the dip.
*
Moldy Cheese Dip
(great on veggies, wings, etc)
*
Greek Yogurt
Crumbled Gorgonzola or Blue Cheese
Red Onion or Shallots
Scallions
Salt/Pepper
Lemon Juice
*
Mix it all together to taste and voila!
*Does get better if you give the dip time to set and the flavors to meld together.
*
Enjoy!

Sunday, February 21, 2010

Asian Hot Wings

Recipe from our Super Bowl 2010 Menu (Super Bowl Sunday 2010).

The following quantities will work for anywhere from 5-10 lbs of chicken wings. Anymore than that and you'll have to up the amount.

Chicken Wings, split if you'd like
1/4 cup ground coriander
1 tsp ground cumin
1 tsp ground cinnamon
2 tbls salt
1/4 cup extra-virgin olive oil
1 cup Sriracha Chile Sauce (use less if you'd like to lower the heat on these)
1-1.5 sticks melted unsalted butter (preference again, if your conscience says less better, then go for it!)
1/2 cup chopped cilantro
3 limes, finely grated zest and juice

Begin by coating wings with coriander, cumin, cinnamon, salt and olive oil. Cover and allow to marinate in refrigerator for at least 4 hours to overnight.

Preheat oven to 475 degrees. Place seasoned wings on wire rack over a baking sheet and put into oven. Allow wings to bake for 45+ minutes, or until skin is crisp. You can rotate/flip wings halfway through cooking to ensure both sides get crispy, but it is not absolutely necessary. Since on the rack, they will crisp on the underside, but end up a bit crispier if you do flip since the fat is dripping off them down into your baking sheet. [Also note, this cooking method will produce a lot of smoke, so turn on your kitchen fan or crack a window as needed.]

Add sriracha, melted butter, cilantro, lime zest and lime juice to a bowl large enough for tossing the cooked wings. May also be done in batches. [Note, if your sriracha is stored in the fridge, you will need to use caution when adding the melted butter...otherwise it'll end up solidifying.]

Toss wings in prepared sauce, plate and serve immediately.

Make for good leftovers, but the wings will loose their crispiness.

Enjoy!

Monday, January 25, 2010

Hussy, this one's for you!

Guava Braising Liquid/BBQ Sauce
*Inspired by a F&W 2007 Recipe

1 jar of Guava Jelly
2/3 cup Cider Vinegar
1/2 cup Dark Rum
3 tbls Tomato Paste (I use the double concentrate tube stuff, so if using typical canned stuff...you may want to use more)
3 juiced Limes
2 tbls Soy Sauce
2 tbls Worcestershire
4 tbls minced fresh Ginger
2 Scallions, white part only, minced
3 Garlic Cloves, minced
1/2-1 cup water

Combine everything in a sauce pan over moderate heat. Once simmering, drop to low and get to work on the pork.

*Note: Since making a braising liquid, you want quantity...extra lime juice, water, etc. Whatever is handy will work. Also, as I was cooking, after the braising liquid began to simmer, I squeezed in some ketchup and whisked in about 1/4 cup of brown sugar...just cause it smelled like it could use it??

The ribs in the first attempt were a combo of Country Style and Southern Style. The only difference I could tell was that the Southern Style had bone in. One highlight is that this is a pretty cheap cut of meat...the second time I made it I went straight Country Style because they were only $0.99/lb!!

You'll need a pan like a Le Creuset. Begin by browning all sides of the seasoned (salt-n-pepper) pork pieces in some hot olive oil. You may need to do this in batches depending on how much you buy.

Place all of the browned ribs into the pan, pour in braising liquid, cover and place in oven. I changed up the temp a bit throughout cooking, but tried to stay within the limits of my Le Creuset handle (see guide). This was between 350 and 375.

Cook for about 2.5 hours, basting and rotating ribs every 15-30 minutes (whatever you have time for).

After about 2 hours, transfer some of the braising liquid into a small sauce pan and simmer on the stove top.

Once time is up, the ribs will be tender (like fall off bone/fall apart), so be gentle. Line up on a baking sheet and brush with the reduced braising liquid (aka BBQ Sauce). Place back into the oven at 350 degrees for about 30 minutes. The sauce will thicken even more and coat the ribs.

Serve warm...excellent as leftovers, so DO make too much :O)

Bon Appetit!!!!